Getting Started with .NET
Starting with .NET is straightforward, whether you're a beginner or an experienced developer. This section will guide you through setting up your development environment, creating your first .NET application, and understanding the basics of .NET development.
ASP.NET Core Web API is a powerful framework for building HTTP-based services, enabling seamless integration and communication between client applications and the server. This tutorial provides a comprehensive overview of ASP.NET Core Web API, including key concepts, architecture, and practical examples to get you started. The concepts and techniques discussed apply to various .NET versions, including .NET 5, .NET 6, .NET 7, and .NET 8 (latest LTS version).
What is a Web API?
A Web API (Application Programming Interface) allows communication between different software applications over the web. It is a set of protocols and tools for building and interacting with software applications, enabling various systems to interact with each other regardless of the platform or language they are built on.
Prerequisites
- Development Environment: Ensure you have the latest version of the .NET SDK installed on your machine. You'll also need a suitable IDE like Visual Studio or Visual Studio Code.
- Basic Knowledge: Familiarity with programming concepts and languages such as C#, JSON, and RESTful principles will be beneficial.
Setting Up the Environment
Follow these steps to set up your development environment for .NET:
- Install .NET SDK: Download and install the latest version of the .NET SDK from the official .NET website.
- Install an IDE: Choose an integrated development environment (IDE) such as Visual Studio or Visual Studio Code. Both are powerful tools for .NET development.
Creating Your First .NET Application
Let's create a simple .NET application to get started. You can use either the command line or an IDE like Visual Studio.
Using the Command Line:
Open a terminal or command prompt and run the following commands to create a new console application:
dotnet new webapi -o MyFirstWebAPI
cd MyFirstWebAPI
dotnet run
These commands will create a new console application in a directory named "MyFirstWebAPI" and run it.
Using Visual Studio:
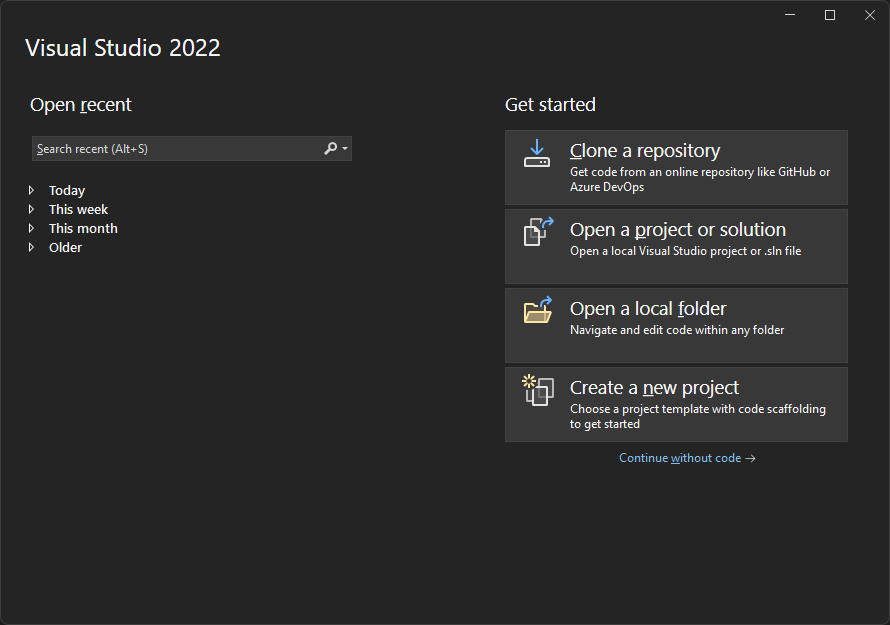
Locate and click on the “Create a new project” button. This is where you begin the process of setting up a new project. The button is prominently displayed as one of the options on the right side of the screen.
1.2 Selecting a Project Template
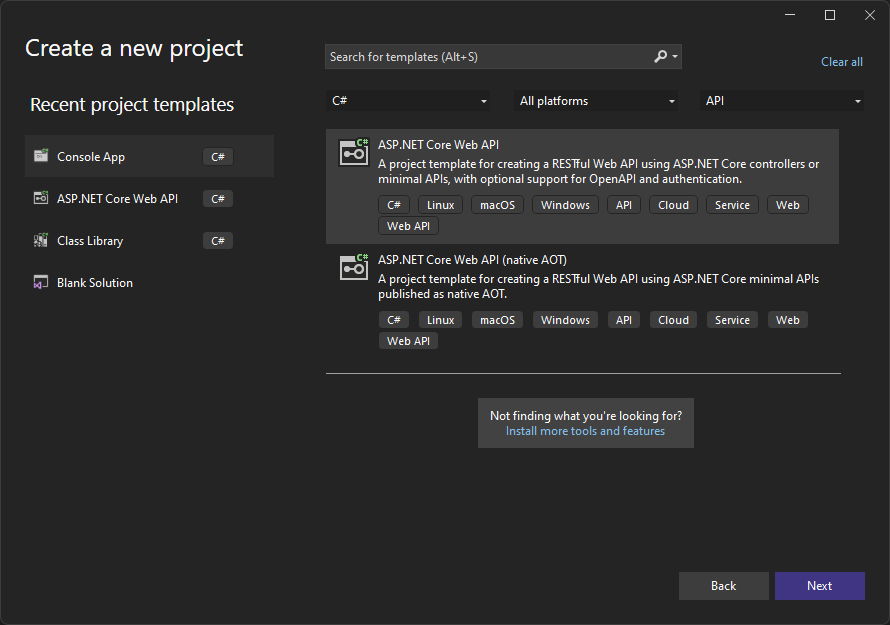
Use the search bar at the top to type Console or select "Console App (.NET Core)" from the dropdown filter to narrow down to relevant templates. This helps in quickly locating the right type of project template.
1.3 Configuring Your New Project
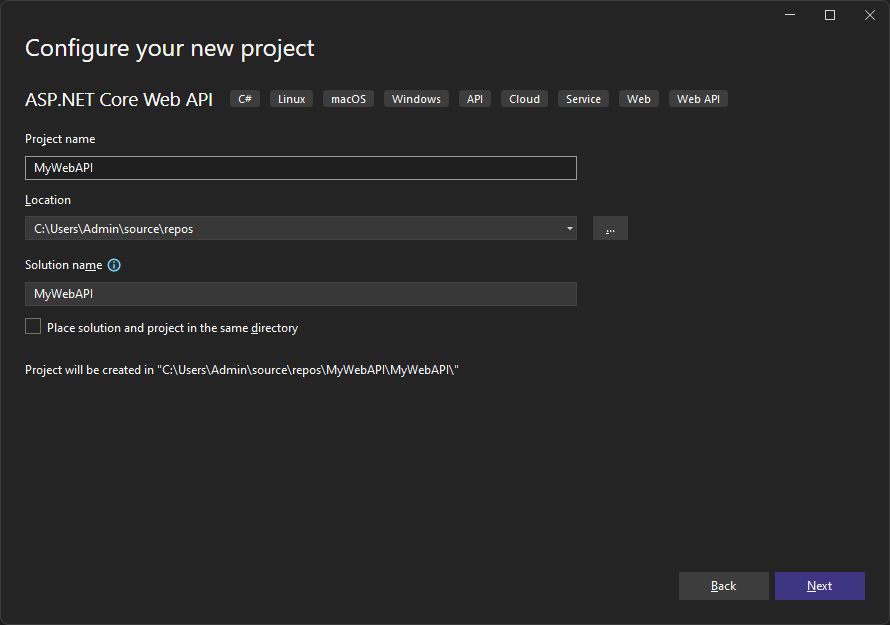
- Project Name: Enter a name for your project. This name identifies your project within Visual Studio and the filesystem.
- Location: Choose the directory where your project files will be stored. This defines the root directory for your project on your computer.
- Solution Name: Usually matches the project name but can be changed if your project is part of a larger solution.
- Directory Structure: You have the option to place the solution and project in the same directory. This can simplify the management of smaller projects.
- Confirmation: Confirm the path where the project will be created to ensure it is correct. Moving projects later can lead to complications.
- Next Steps: Once all fields are correctly filled, click the "Next" button to proceed to additional project settings.
1.4 Configuring Additional Settings for Your ASP.NET Core Web API
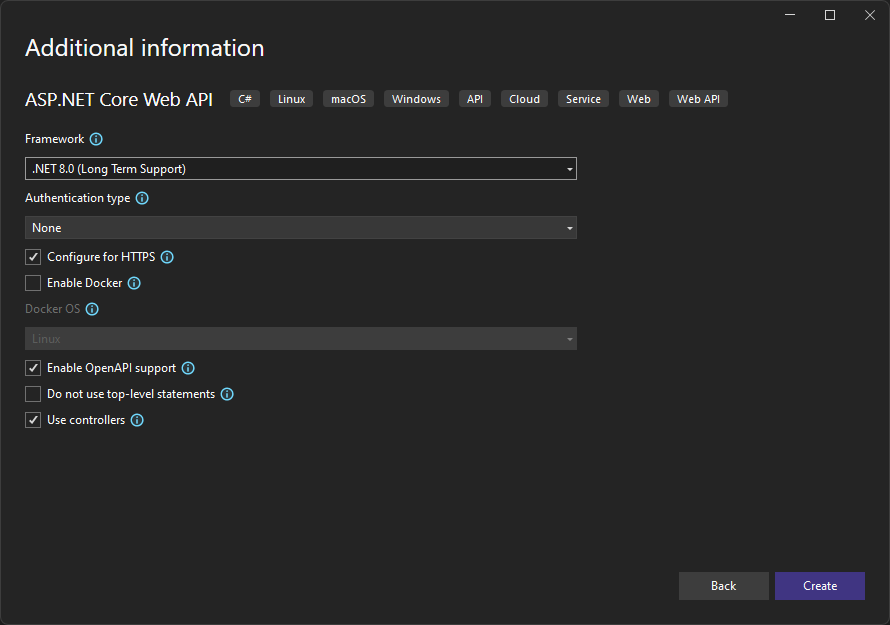
- Framework: Choose the .NET framework version for your project. Opt for ".NET 8.0 (Long Term Support)" for projects requiring long-term stability.
- Authentication Type: Select the appropriate authentication method for your API, with options ranging from None to more complex identity solutions.
- Configure for HTTPS: Ensure your API is secure by enabling HTTPS, which encrypts data sent to and from your API.
- Enable Docker: If planning to deploy using containers, enable Docker and choose the operating system like Linux or Windows for container deployment.
- Enable OpenAPI Support: Activate OpenAPI support for automatic documentation and client SDK generation, enhancing API accessibility and testing.
- Do not use top-level statements: Opt to include or exclude top-level statements based on your coding style preference. This affects the structure of your program files.
- Use controllers: Decide whether to structure your API using controllers. If unchecked, your project will default to using minimal APIs.
Understanding Project Files
When you create a new .NET project, several files and folders are generated. Here's an overview of the most important ones:
- Program.cs: The main entry point for your application. Contains the Main method where the execution starts.
- Startup.cs: Configures services and the app's request pipeline. It's where you register middleware components and services.
- Controllers Folder: Contains controller classes that handle HTTP requests and generate HTTP responses. Each controller typically corresponds to a specific resource or group of related actions.
- appsettings.json: A configuration file used to store application settings such as connection strings and other configuration options.
- Properties Folder: Contains project properties and configuration files, including launch settings for debugging.
- wwwroot Folder: The root for your application's static files like HTML, CSS, and JavaScript.
- csproj File: Contains project configuration information, such as target frameworks and package dependencies.
- Dependencies: Lists NuGet packages and project references used by your application.
Building and Running the Application
Once your project is set up, you can build and run it to see it in action.
- Building: Use the build command in the command line or the build button in Visual Studio to compile your application.
- Running: Run your application using the command line or the run button in Visual Studio to see the output.
- Debugging: Utilize debugging tools to find and fix errors in your application. Set breakpoints and inspect variables to understand the behavior of your code.
Conclusion
By following these steps, you'll have your .NET development environment set up and your first application running. This foundation will prepare you for more advanced topics and development in .NET.