Introduction to .NET Core Web API Projects
A .NET Core Web API project is designed to help you build performant, scalable, and secure web services easily. This tutorial will guide you through setting up a new .NET Core Web API project from scratch, including necessary configurations, project structure, and initial deployment. We'll cover everything from environment setup to advanced features.
Prerequisites:
- Development Environment: Ensure you have the latest version of .NET Core SDK installed on your development machine. Also, an appropriate IDE like Visual Studio or Visual Studio Code is required.
- Basic Knowledge: Familiarity with C#, JSON, and RESTful principles will be beneficial.
Step-by-Step Guide to Create a New Web API Project
1. Creating the Project
dotnet new webapi -n MyWebApiProject
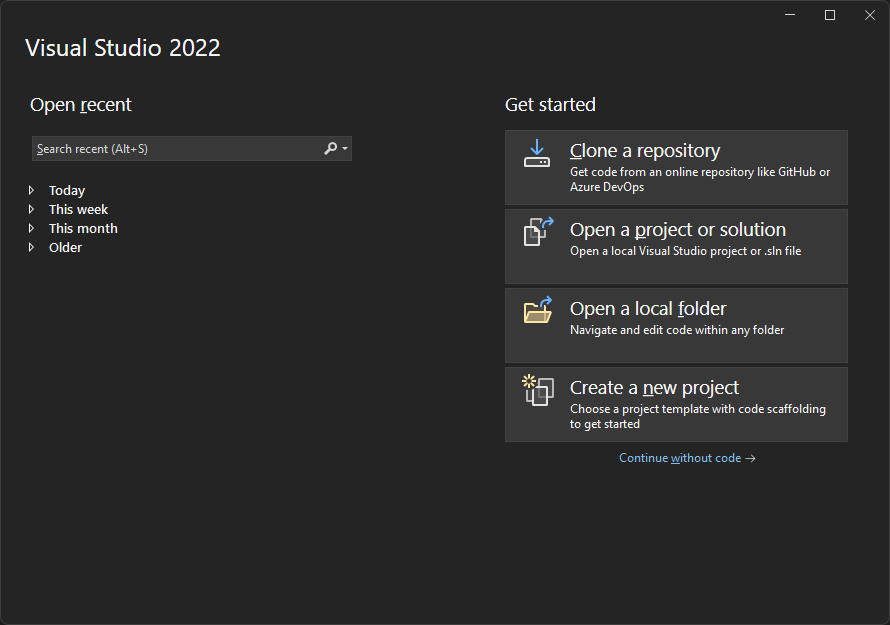
Locate and click on the “Create a new project” button. This is where you begin the process of setting up a new project. The button is prominently displayed as one of the options on the right side of the screen.
1.2 Selecting a Web API Project Template
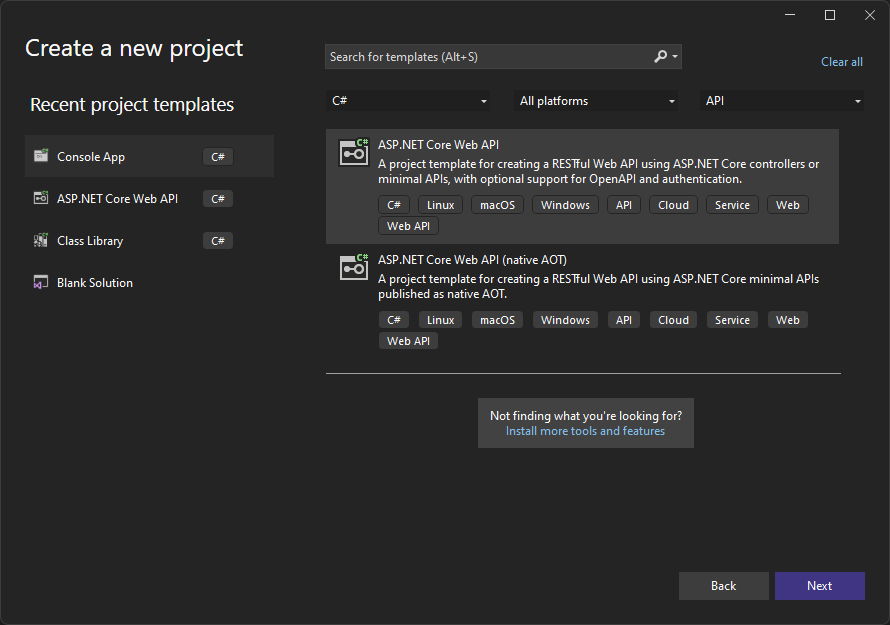
Use the search bar at the top to type API or select "ASP.NET Core Web API" from the dropdown filter to narrow down to relevant templates. This helps in quickly locating the right type of project template suited for web APIs.
From the filtered results, you’ll see several options:- ASP.NET Core Web API: Ideal for creating RESTful APIs using ASP.NET Core, with options for OpenAPI and authentication support.
- ASP.NET Core Web API (native AOT): Suitable for creating high-performance APIs with ahead-of-time compilation.
1.3 Configuring Your New ASP.NET Core Web API Project
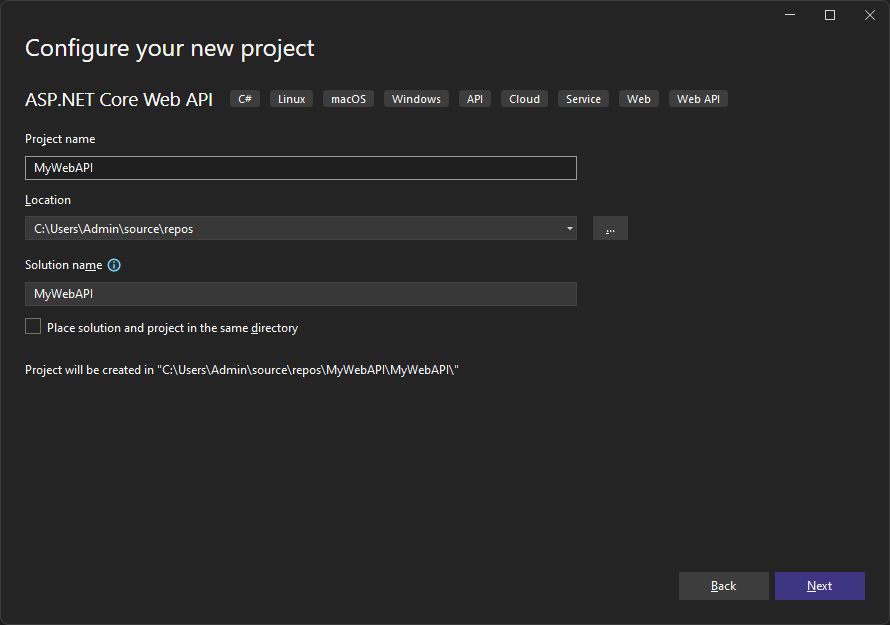
- Project Name: Enter a name for your project. This name identifies your project within Visual Studio and the filesystem.
- Location: Choose the directory where your project files will be stored. This defines the root directory for your project on your computer.
- Solution Name: Usually matches the project name but can be changed if your project is part of a larger solution.
- Directory Structure: You have the option to place the solution and project in the same directory. This can simplify the management of smaller projects.
- Confirmation: Confirm the path where the project will be created to ensure it is correct. Moving projects later can lead to complications.
- Next Steps: Once all fields are correctly filled, click the "Next" button to proceed to additional project settings.
1.4 Configuring Additional Settings for Your ASP.NET Core Web API
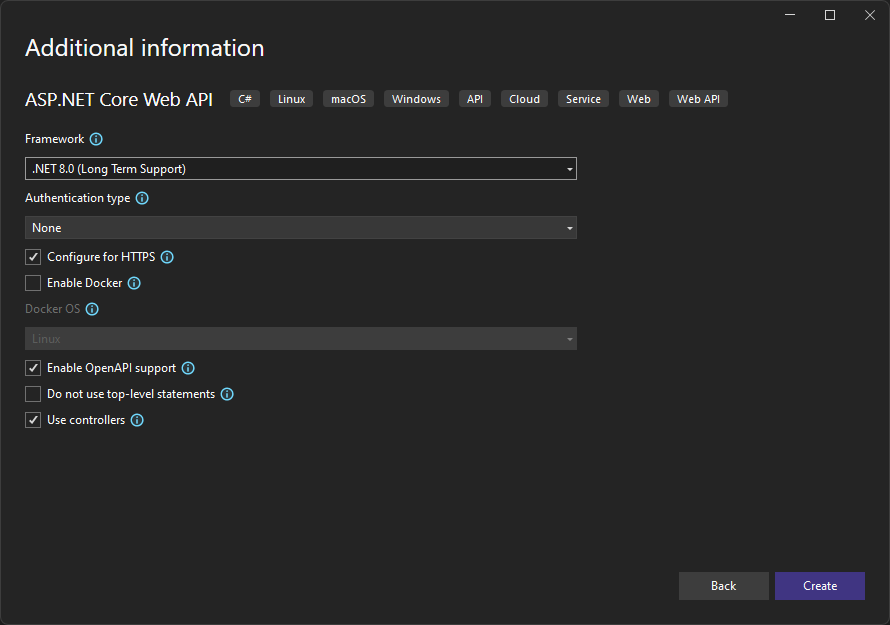
- Framework: Choose the .NET framework version for your project. Opt for ".NET 8.0 (Long Term Support)" for projects requiring long-term stability.
- Authentication Type: Select the appropriate authentication method for your API, with options ranging from None to more complex identity solutions.
- Configure for HTTPS: Ensure your API is secure by enabling HTTPS, which encrypts data sent to and from your API.
- Enable Docker: If planning to deploy using containers, enable Docker and choose the operating system like Linux or Windows for container deployment.
- Enable OpenAPI Support: Activate OpenAPI support for automatic documentation and client SDK generation, enhancing API accessibility and testing.
- Do not use top-level statements: Opt to include or exclude top-level statements based on your coding style preference. This affects the structure of your program files.
- Use controllers: Decide whether to structure your API using controllers. If unchecked, your project will default to using minimal APIs.
1.5 Exploring the Visual Studio 2022 IDE with Your New Web API Project
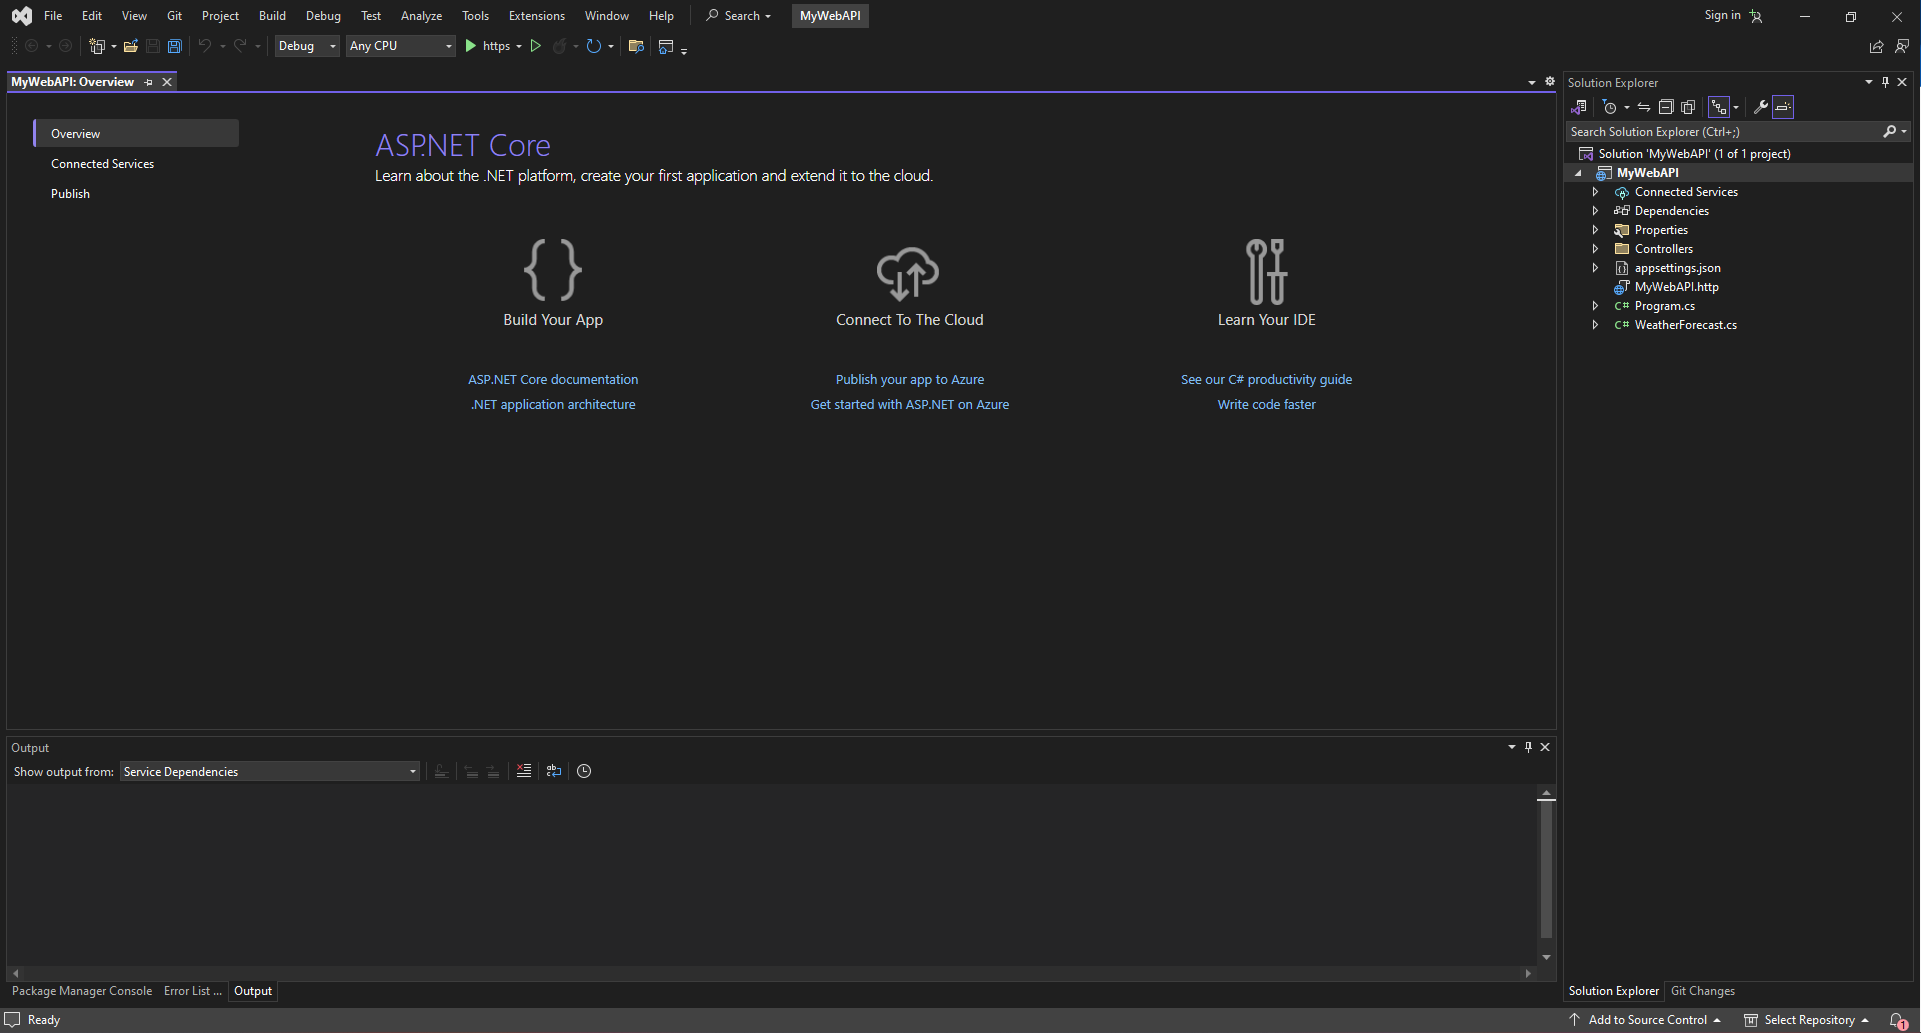
- Solution Explorer: Access and manage all components of your project, such as files, dependencies, and controllers, through the Solution Explorer on the right side of the IDE.
- Overview Page: Utilize the central Overview page for quick links to essential ASP.NET Core documentation, architecture guides, and cloud services, aiding in effective learning and application development.
- Build and Debug Tools: Use the top toolbar for building and debugging your application, essential for development, testing, and maintenance.
- Search Functionality: Quickly locate files, settings, and commands within your project using the Search bar at the top of the IDE.
- Git Integration: Manage version control through integrated Git functionality at the top-right of the IDE, facilitating easier change tracking and collaboration.
- Bottom Windows: Monitor detailed information on build processes and runtime errors in the Output and Error List windows at the bottom of the IDE, critical for debugging and optimization.
2. Understanding the Project Structure
            The default project structure for an ASP.NET Core application includes several key directories and files:

1. **Controllers** - This directory contains the controller classes responsible for handling incoming HTTP requests and returning responses to the client.

2. **Models** - This directory holds the classes that represent the data of the application and the logic to manage that data.

3. **Views** - In the case of MVC applications, this directory contains the files used for rendering the user interface. The views are typically Razor view files (.cshtml).

4. **wwwroot** - This folder contains static files like JavaScript, CSS, and images. Files in this folder can be served directly to clients.

5. **appsettings.json** - This file includes the configuration settings for the application, such as connection strings and other settings.

6. **Startup.cs** - This file contains the startup class that configures services and the app's request pipeline.

7. **Program.cs** - This is the entry point of the application, which sets up the web host and starts it.

This structure helps organize the application in a logical way, making it easier to manage as it grows.
3. Configuring Services and Middleware
            public void ConfigureServices(IServiceCollection services)
{
    services.AddControllers();
}
            public void Configure(IApplicationBuilder app)
{
    app.UseRouting();
    app.UseAuthorization();
    app.UseEndpoints(endpoints =>
    {
        endpoints.MapControllers();
    });
}
4. Developing Your First API Controller
            [ApiController]
[Route('api/[controller]')]
public class SampleController : ControllerBase
{
    [HttpGet]
    public IActionResult Get()
    {
        return Ok('Success');
    }
}
            Best practices for API controllers in ASP.NET Core include using [ApiController] attribute, proper routing,
and clear action methods.
5. Managing Dependencies
ASP.NET Core supports built-in dependency injection. It helps in managing dependencies across your application.
            public void ConfigureServices(IServiceCollection services)
{
    services.AddSingleton<IMyService, MyService>();
}
6. Implementing Logging
            public void ConfigureServices(IServiceCollection services)
{
    services.AddLogging(config =>
    {
        config.AddDebug();
        config.AddConsole();
    });
}
            private readonly ILogger _logger;

public SampleController(ILogger<SampleController> logger)
{
    _logger = logger;
}

[HttpGet]
public IActionResult Get()
{
    _logger.LogInformation('Called Get');
    return Ok();
}
7. Adding and Configuring Entity Framework Core
dotnet add package Microsoft.EntityFrameworkCore.SqlServer
            public void ConfigureServices(IServiceCollection services)
{
    services.AddDbContext<ApplicationDbContext>(options =>
        options.UseSqlServer(Configuration.GetConnectionString("DefaultConnection")));
}
8. Testing and Debugging the API
Use xUnit for unit testing. Create separate test projects. Mock dependencies using Moq.
            Create a new request in Postman. Set the HTTP method to GET. Enter the API URL. Send the request
and examine the response.
Conclusion
By following these steps, you will have set up a robust .NET Core Web API project capable of scaling and adapting to your needs. Remember, the key to mastering web development is continual learning and adapting to new technologies.