CSS Padding
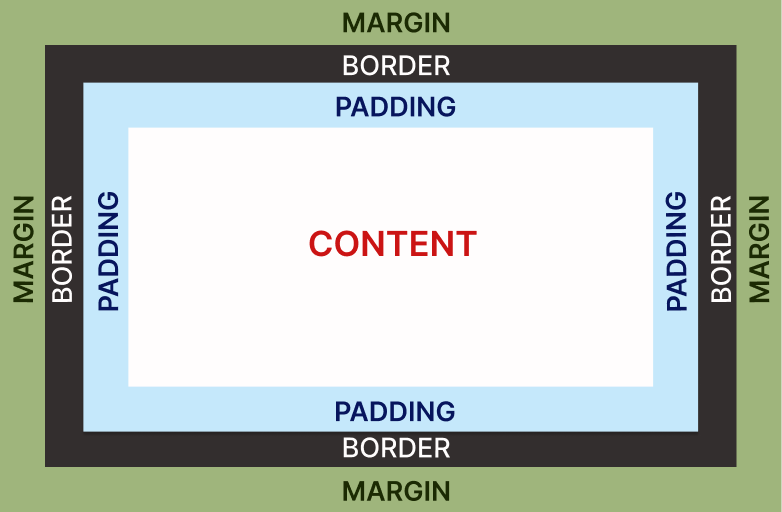
Padding in CSS is a crucial property that allows you to control the spacing between an element's content and its border. It can be used to create space around an element's content, giving it a clean and visually appealing appearance.
Basic Syntax
Padding can be applied to any HTML element using the following syntax:
            selector {
    padding: top right bottom left;
}
You can specify the padding for each side separately (top, right, bottom, left), or use shorthand properties to set them all at once. If fewer values are provided, they will be applied to specific sides in the order of top, right, bottom, and left.
Using Shorthand
Using shorthand is a common way to apply padding.
            /* Apply the same padding to all sides */
.container-1 {
    padding: 10px;
    border: 1px solid black;
}

/* Apply vertical padding (top and bottom) and horizontal padding (left and right) */
.container-2 {
    padding: 10px 20px;
    border: 1px solid black;
}

/* Apply top padding, right padding, bottom padding, and left padding individually */
.container-3 {
    padding: 10px 20px 30px 40px;
    border: 1px solid black;
}
Padding Units
You can set the padding using different units such as pixels (px), ems (em, rem), percentages (%), and more.
Padding and Box Sizing
Keep in mind that padding is added to an element's width and height. This can affect the overall dimensions of an element. By default, CSS includes padding within an element's specified width and height. However, you can modify this behavior using the box-sizing property.
            div{
    padding: 20px;
    box-sizing: border-box; /* Include padding in the element's dimensions */
    border: 1px solid #ccc;
}
Padding and Background Color
Padding affects the space around an element's content. When you set a background color, it will extend to fill the padding area. This can be visually appealing and used for creating different design effects.
            div{
   padding: 20px;
   background-color: #f2f2f2; /* Background color extends to padding area */
}